👤
LV 1
Guest
 0
0 0
0 0
0 0
0 0
0GachaMAL
✦ Live MyAnimeList Characters ✦
Daily Login Bonus
Log in 7 days to earn up to 20 tickets + bonus rewards each day.
tickets + bonus rewards each day.ACTIVE
Global Pull Milestones
Every pull you make counts. When the entire playerbase hits milestones, everyone gets free Crystals!
Crystals!
GACHAPON
Gachapon Machine
Spend 100 for a random prize — crystals, tickets, gold, or a rare chest!
for a random prize — crystals, tickets, gold, or a rare chest!DAILY FREE
TAP TO SUMMON
→
Drop Rates
R · 58%
Rare
SR · 34%
Super Rare
SSR+ · 6%
Super Super Rare
UR · 1%
Ultra Rare
★ SSR+ guaranteed at 70 pulls · UR guaranteed at 120 pulls
★ Characters from MyAnimeList via Jikan API · Duplicates raise Constellation
★ 200 per pull or 1 · Recycle extras for Gold in the Forge
★ Characters from MyAnimeList via Jikan API · Duplicates raise Constellation
★ 200
per pull or 1 · Recycle extras for Gold in the Forge
🟡 Gachapon Machine
One free spin per day · 100 per spin after
per spin after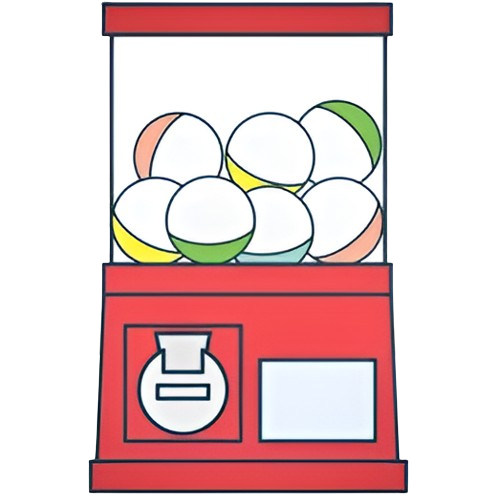
FREE TODAY
PRIZE ODDS
THEME
🌌
Pull to start your collection!
⚔ Quest Board
Refresh in: 20:00
🗡 Battle Arena
BIOME STAGES
9 biomes · 20 stages each
BOSS RAID
5 heroes vs UR Boss
RANDOM BATTLE
5v5 vs random opponents
⚔ YOUR EXPEDITION TEAM
Counter-element characters (e.g. 💧 Water in a 🔥 Fire biome) gain +60% ATK & +40% DEF. Same-element characters take +45% more damage.
SELECT BIOME
🛒 Gold Shop
Spend Gold to level up characters or craft gear.
Gold to level up characters or craft gear.Complete quests for rewards. Resets at midnight. Finish all for a bonus!
⚙ Records
0
Total Pulls
0
UR Obtained
0
Unique Cards
0
Crystals Spent
0
Quests Done
0
Daily Quests
0
Battles Won
0
Gold Earned
Pull History
No pulls yet!
⚔ Battle Basics
Battles are turn-based using a speed bar. Every character and enemy has a SPD stat — the fastest characters act most often. Fill the bar to 100 to take a turn.
Each turn you choose Basic Attack or spend Charges for an Ultimate. Enemies act automatically. Boss raids give the boss an AoE attack that hits all your characters every time it acts — and it gets stronger as the fight goes on.
AUTO mode plays turns for you automatically. Toggle it in battle with the ⚡ AUTO button.
🔥 Element Chart
Elements deal 2.0× damage to their counter and 0.5× damage if the defender shares your element. Counters go both ways.
In Biome Stages: Counter-element characters gain +60% ATK & +40% DEF. Same-element characters take +45% more damage. Building the right team makes a big difference.
In Biome Stages: Counter-element characters gain +60% ATK & +40% DEF. Same-element characters take +45% more damage. Building the right team makes a big difference.
Fire → counters ❄ Ice
countered by 💧 Water
countered by 💧 Water
Water → counters 🔥 Fire
countered by ⚡ Lightning
countered by ⚡ Lightning
Lightning → counters 💧 Water
countered by 🌪 Wind
countered by 🌪 Wind
Wind → counters ⚡ Lightning
countered by 🪨 Earth
countered by 🪨 Earth
Earth → counters 🌪 Wind
countered by 🔥 Fire
countered by 🔥 Fire
Ice → counters 🔥 Fire
countered by 🔥 Fire
countered by 🔥 Fire
Light → counters 🌑 Dark
countered by 🌑 Dark
countered by 🌑 Dark
Dark → counters ✨ Light
countered by ✨ Light
countered by ✨ Light
🛡 Classes
Characters have a hidden class revealed in their detail view. Classes affect stat multipliers and skill pools.
Ranger — The finisher. Skills deal bonus damage to targets with active DoTs and execute weakened enemies. Pairs best with Mage or Bard to stack debuffs before striking.
Sentinel — The reactive wall. Uses Guard to set up counter-strikes, barriers allies, and punishes attackers via Counter Aura. DEF stat directly boosts barrier strength. Pairs well with Cleric or Bard.
🛡 KnightBalanced attack + defence
🏋 TankHigh HP/DEF, redirects damage
🔮 MageHigh M.ATK, AoE & DoT
💛 ClericHealer, Death's Door saves allies
🎵 BardSPD debuffs, team buffs
✝ PaladinMixed ATK, self-cleanses
🏹 RangerHigh PATK/SPD, DoT execute
🔶 SentinelReactive barriers, counters
Ranger — The finisher. Skills deal bonus damage to targets with active DoTs and execute weakened enemies. Pairs best with Mage or Bard to stack debuffs before striking.
Sentinel — The reactive wall. Uses Guard to set up counter-strikes, barriers allies, and punishes attackers via Counter Aura. DEF stat directly boosts barrier strength. Pairs well with Cleric or Bard.
⚒ Gear Crafting
Gear is crafted via Blueprints + Materials in the Blacksmith (Inventory → Blacksmith tab).
1. Load a Blueprint — it shows required materials and potential passives.
2. Add materials into the slots. Each material adds a passive effect to the gear.
3. Hit Craft — the gear rolls its rarity and passive effects from the materials you added.
Gear has 3 equipment slots per character: Weapon (slot 1), Armor ×2 (slots 2–3). Weapons add P.ATK passives and proc effects. Armor pieces trigger on-hit procs.
Materials are dropped from Expeditions, Battle, and Chests.
🔮 Character Shards
Collect 60 shards of a rarity (R / SR / SSR / UR) to redeem any character of that rarity from MyAnimeList.
You choose the character by searching MAL or pasting a MAL character URL. Your shards are only spent when you press Confirm — closing without confirming costs nothing.
Shards drop from: Daily Login, Boss Raid loot tiers, Chests, and occasionally from Gacha pulls.
You choose the character by searching MAL or pasting a MAL character URL. Your shards are only spent when you press Confirm — closing without confirming costs nothing.
Shards drop from: Daily Login, Boss Raid loot tiers, Chests, and occasionally from Gacha pulls.
👑 Boss Raid
A new boss spawns every 6 hours — a real anime character pulled from MAL weighted by popularity. Deploy 5 characters and deal as much damage as possible in 60 turns.
The boss scales to your collection strength — the stronger your roster, the harder the boss that spawns next rotation. This means progression genuinely matters: pulling stronger characters makes future bosses tougher, but lets you hit higher loot tiers. You can't game it by deploying weak characters — it always measures your whole collection. Average teams need all 3 attempts; strong geared teams can clear in 1–2. The boss hits hard: it AoEs all 5 characters every turn and has 3 phases — gaining more ATK and speed, then applying a team-wide DEF Down at 33% HP.
The boss has 12 loot tiers — deal more cumulative damage (across all 3 attempts) to unlock better rewards. Early tiers give R/SR Chests; late tiers give SSR Chests, Crystals, and UR Shards. Defeating the boss gives 500+ crystals (scales with difficulty) and a 50% chance to capture the boss character as SSR or UR — the capture plays out as a full summon reveal, just like pulling from the gacha.
Attempts: 1st is free, 2nd and 3rd cost 100 each. Damage carries over between attempts.
The boss scales to your collection strength — the stronger your roster, the harder the boss that spawns next rotation. This means progression genuinely matters: pulling stronger characters makes future bosses tougher, but lets you hit higher loot tiers. You can't game it by deploying weak characters — it always measures your whole collection. Average teams need all 3 attempts; strong geared teams can clear in 1–2. The boss hits hard: it AoEs all 5 characters every turn and has 3 phases — gaining more ATK and speed, then applying a team-wide DEF Down at 33% HP.
The boss has 12 loot tiers — deal more cumulative damage (across all 3 attempts) to unlock better rewards. Early tiers give R/SR Chests; late tiers give SSR Chests, Crystals, and UR Shards. Defeating the boss gives 500+ crystals (scales with difficulty) and a 50% chance to capture the boss character as SSR or UR — the capture plays out as a full summon reveal, just like pulling from the gacha.
Attempts: 1st is free, 2nd and 3rd cost 100
each. Damage carries over between attempts.
📦 Chests, Satchels & Blueprints
Chests and Satchels are consumable items that give gear blueprints and crafting materials when opened. They come in rarity tiers — R, SR, and SSR — with higher tiers giving rarer blueprints and more materials.
Satchels (👜) are smaller drops — 1 blueprint + a couple of materials. Chests (📦) are larger — 2–3 blueprints + more materials, with a chance at set-piece blueprints.
How to get them:
· Quest Board — completing quests drops 1–3 chests based on difficulty and luck. Easy quests drop mostly R chests; Extreme quests can drop SSR chests.
· Boss Raid loot tiers — dealing enough damage unlocks chest tiers as rewards.
· Gachapon Machine — R satchels and SR chests appear in the prize pool.
· Battle victories — occasional drops from defeating enemies.
Blueprints are the recipes used in the Blacksmith (Inventory → Blacksmith). Each blueprint shows what materials it needs and what passive effects those materials unlock. Blueprints from higher-tier chests produce rarer, more powerful gear. You can have multiple copies of the same blueprint — each one is consumed when you craft.
❓ Common Q&A
How do I get more crystals? ▼
Daily login, boss raid tiers, completing daily quests, battle victories, and milestone achievements all give crystals. The anime banner first multi-pull is discounted.
Why does my character always have the same stats? ▼
Stats are deterministically seeded from the character's MAL ID — so the same character always gets the same base stats. Class and level can still change them.
What is Essence? ▼
Essence is used to level up characters in the Gold Shop. Higher level characters have stronger stats. Max base level is 60; Constellation raises the cap by +10 per star.
How does Constellation work? ▼
Constellation (C0–C6) is raised by pulling duplicate characters. Each star raises the level cap and improves skill damage. C3 makes skills proc sooner; C4+ boosts Ultimates.
What are Gems? ▼
Gems? ▼Gems are a rare premium currency earned from milestones and boss raids. They are used for Constellation upgrades.
How do I save my progress? ▼
Sign in with the ☁ SAVE button in the top right. Progress is saved to Supabase cloud automatically every few seconds when signed in. Guest progress is stored in your browser only.
What happens if I close the tab? ▼
Signed-in players keep all progress via cloud save. Guest players keep progress in localStorage unless they clear their browser data.
Can I use the same character in multiple teams? ▼
No — a character can only be in one team slot at a time within the same team selector. You can build multiple teams in the collection Team Builder to swap between them.
What do SSR Chests and UR Shards do? ▼
SSR Chests contain blueprints and rare materials. UR Shards accumulate toward a free pick of any UR character from MAL — 60 shards = 1 redemption. Shards come from boss raids and daily rewards.
How does the Boss Raid work? ▼
A boss spawns every 6 hours as a real popular anime character. Deploy 5 characters and deal as much damage as possible in 60 turns. The boss scales to your collection (not your raid team) — stronger roster = harder boss = better loot potential. It AoEs all 5 players every turn and has 3 phases with increasing ATK and a DEF Down aura at 33% HP. You get 3 attempts (1st free, 2nd–3rd cost 100 💎 crystals each). Damage carries over between attempts and unlocks 12 loot tiers. Defeating the boss gives 500+ crystals (scales with difficulty) and a 50% chance to capture the boss character as SSR or UR — just like a summon pull.
🏆 Team Composition Tips
A well-rounded team covers three roles: Frontline, Damage, and Support.
🏋 Tank/Sentinel frontline: Tank uses Taunt to lock enemy fire onto your toughest character; Sentinel uses Guard to set up counter-strikes and reactive barriers. Pair either with a Cleric or Bard to keep barrier and DEF buffs on them while the rest of your team deals damage freely.
🔮 Damage core: Mage and Paladin deal the most burst. Mage with burn materials melts single targets; Paladin with elemental gear handles mixed-type enemies. Ranger shines as an execute finisher — stack DoTs with Mage first, then Ranger's Quickshot bonuses and execute skills delete weakened targets.
💛 Support backbone: Cleric is the best single-target protector (Aegis Ward on whoever is getting focused) and now carries Death's Door to save an ally from fatal damage once per fight. Bard accelerates the team with SPD buffs and can barrier the whole team cheaply.
🏹 DoT Combo: Mage (Ember Cast burn) + Ranger (Quickshot dotBonus trigger) is a powerful two-punch — Mage applies the DoT, Ranger deals +40% bonus damage on every subsequent hit plus amplifies the DoT ticks by 15% via Hemorrhage passive.
Speed matters: The highest-SPD character acts most often. A SPD-boosted Bard or Cleric can barrier every single turn before enemies act. Stack SPD on supports; stack ATK/MATK on damage dealers.
⚒ Gear Strategy by Class
🏋 Tank: Weapon — Taunt companion materials (Ironclad Dust through Titan Heart) activate on-taunt bonuses. Armor — Warden Shell, Resonant Iron, Bulwark Plating. Goal: redirect pressure to yourself and survive it.
🔶 Sentinel: Weapon — Sentinel Core and Bulwark Crystal (barrier power scales with DEF); Aegis Titan Core (proc: barrier all allies + potency boost). Armor — Shield Stone, Fortress Plating, Colossus Shell (on-hit barrier procs). Goal: maintain a barrier loop so Guard counter-strikes trigger constantly. Higher DEF = stronger barriers via Shield Discipline passive.
💛 Cleric: Weapon — Guardian Crystal (team barrier on proc), Aegis Fragment (lowest-ally barrier), Fortress Core (+20% barrier potency). Armor — Deep Scale Vest (+15% healing received), Abyssal Mantle (cleanse + regen on hit). Goal: keep barrier on the team every round. Death's Door passive saves one teammate per fight automatically.
🎵 Bard: Weapon — Barrier materials (Ward Dust, Aegis Fragment) turn Refrain into a combo skill. Armor — Storm Cloak (dodge), Tempest Plate (SPD + team SPD). Goal: Refrain every basic for damage + team barrier. Save Bulwark Song for emergency coverage.
🔮 Mage: Weapon — Ember Shard + Scorched Ash for burn magnitude/extension; Eclipse Edge for debuff-scaling proc damage. Armor — Glacial Mirror, Stormwoken Plate. Goal: stack DoT and debuffs before Ranger finishes targets.
🏹 Ranger: Weapon — Razorthorn (Bleed on hit + proc DMG); Venomfang Core (Bleed + Poison on proc); Apex Predator Gem (high crit + crit threshold bonus); Eclipse Edge (proc DMG scales with debuffs on target). Armor — Phantom Silk (15% dodge); Predator Hide (Bleed attacker on hit); Shadowstep Mantle (SPD + dodge + ATK Up on dodge). Goal: open with Venom Shot to apply Bleed, use Quickshot for bonus DMG, then Execute or Rain of Arrows to finish. Pair with a Mage to stack additional DoTs for maximum Quickshot and Hemorrhage value.
✝ Paladin: Weapon — Resonant Core (proc DMG scales with PATK), Thunder Core (crit + stun). Armor — Magma Core Plate (burn attacker + DEF Up). Goal: mixed ATK/MATK damage with high crit. Absolution passive now cleanses one self-debuff per basic attack — run confidently against enemies with on-hit debuffs.
🔷 Barrier vs 🔵 Shield — When to Use Which
🔷 Barrier is a full extra HP pool (up to 100% of the target's max HP). Damage must drain the entire barrier before touching real HP. Barrier has half DEF applied, so high-DEF tanks absorb even more. Best used proactively before a big boss attack.
🔵 Shield is a one-hit absorber — it blocks one incoming attack then breaks. Better for reactive protection (armor procs) and against single large hits. Warden Shell passively reduces every incoming hit; Sacred Shield blocks one guaranteed hit.
Stack them: A tank with a Barrier active AND a Shield status absorbs two full attacks before taking HP damage. Combine Tank Taunt (draws all fire) + Cleric Aegis Ward (barrier on tank) + Paladin Sacred Shield for near-invincibility on a single target for a few turns.
📢 Taunt Strategy
Taunt forces all enemies to target the taunting character with single-target attacks for 2 turns. AoE attacks bypass it — if the enemy team uses AoE skills, Taunt is less impactful.
Best synergies:
· Titan Heart (UR weapon): On taunt success — self barrier 50% HP + self DEF+30% + team DEF+15%. The single most powerful taunt setup.
· Warden Core (SSR): Barrier 30% + DEF+20% on taunt — excellent for tanking sustained damage.
· Rampart basic: Pre-emptively barrier yourself 50% HP before using Taunt so you have buffer before the focus begins.
Timing: Use Taunt when your damage dealers are about to use Ultimates — enemies will be locked onto the Tank while your mages and paladins burst freely. Taunt expires after 2 of the tank's own turns, so refresh it before it drops.
🔴 Debuffs — Damage Over Time
Burn
8% max HP / turn · 2t base
Applied by: Mage, Paladin, Fire mats
Countered by: Ashen Membrane (converts to DEF Up)
8% max HP / turn · 2t base
Applied by: Mage, Paladin, Fire mats
Countered by: Ashen Membrane (converts to DEF Up)
Poison
7% max HP / turn · 3t base
Applied by: Dark armor passives
Stacks with Burn
7% max HP / turn · 3t base
Applied by: Dark armor passives
Stacks with Burn
Bleed
6% max HP / turn · 2t base
Applied by: Ranger skills, pierce weapons
Ranger's Hemorrhage passive amplifies all DoT ticks by +15%
6% max HP / turn · 2t base
Applied by: Ranger skills, pierce weapons
Ranger's Hemorrhage passive amplifies all DoT ticks by +15%
Holy Burn
6% max HP / turn · 1t
Applied by: Paladin Judgment passive
Counts as Burn for material effects
6% max HP / turn · 1t
Applied by: Paladin Judgment passive
Counts as Burn for material effects
🟡 Debuffs — Control
Stun
Skips target's next turn · 1t
Applied by: Tank Shield Slam, weapon procs
Stormwoken Plate: on expiry gain ATK+SPD Up
Skips target's next turn · 1t
Applied by: Tank Shield Slam, weapon procs
Stormwoken Plate: on expiry gain ATK+SPD Up
Freeze
Skips target's next turn · 1t
Applied by: Ice weapons, Mage Blizzard
Glacial Mirror: attacker gets Chilled
Skips target's next turn · 1t
Applied by: Ice weapons, Mage Blizzard
Glacial Mirror: attacker gets Chilled
Blind
Halves outgoing damage · 2t
Applied by: Paladin Sacred Blow, dark armor
Good opening debuff on strong single targets
Halves outgoing damage · 2t
Applied by: Paladin Sacred Blow, dark armor
Good opening debuff on strong single targets
Chill
SPD −20% · 2t
Applied by: Mage Frost Shard, Ice armor
Slows enemy turn frequency significantly
SPD −20% · 2t
Applied by: Mage Frost Shard, Ice armor
Slows enemy turn frequency significantly
🟠 Debuffs — Stat Down
DEF Down
DEF ×0.85 (−15%) · 1t
Applied by: Dark weapons (Void Lens), armor reactives
Best before a big damage turn
DEF ×0.85 (−15%) · 1t
Applied by: Dark weapons (Void Lens), armor reactives
Best before a big damage turn
SPD Down
SPD ×0.70 (−30%) · 2t
Applied by: Wind weapons, Bard skills
Stronger than Chill; delays enemy turns more
SPD ×0.70 (−30%) · 2t
Applied by: Wind weapons, Bard skills
Stronger than Chill; delays enemy turns more
MATK Down
MATK ×0.80 (−20%) · 2t
Applied by: Bard Dissonant Note
Great counter to Mage/Paladin enemies
MATK ×0.80 (−20%) · 2t
Applied by: Bard Dissonant Note
Great counter to Mage/Paladin enemies
Armor Break
DEF ×0.75 (−25%) · 2t
Applied by: Greathammer of Ruin proc
Strongest DEF reduction in the game
DEF ×0.75 (−25%) · 2t
Applied by: Greathammer of Ruin proc
Strongest DEF reduction in the game
🟢 Buffs — Active
Barrier
Extra HP pool up to 100% max HP
Damage hits barrier first (half DEF applied)
DoT bypasses barrier · Blue bar on HP
Extra HP pool up to 100% max HP
Damage hits barrier first (half DEF applied)
DoT bypasses barrier · Blue bar on HP
Shield
One-hit absorber · breaks after 1 hit
Absorbs % or flat amount of one attack
Applied by: Paladin Sacred Shield, Pavise proc
One-hit absorber · breaks after 1 hit
Absorbs % or flat amount of one attack
Applied by: Paladin Sacred Shield, Pavise proc
Taunting
Entire enemy team targets this char · 2t
AoE skills bypass taunt
Applied by: Tank Taunt skill (30% chance)
Entire enemy team targets this char · 2t
AoE skills bypass taunt
Applied by: Tank Taunt skill (30% chance)
Regen
Heals HP each turn
Applied by: Cleric Blessed passive, Water armor
Stacks with Barrier for excellent sustain
Heals HP each turn
Applied by: Cleric Blessed passive, Water armor
Stacks with Barrier for excellent sustain
Dodge
Chance to negate incoming hit entirely
Applied by: Wind armor passives
15–30% dodge chance per proc
Chance to negate incoming hit entirely
Applied by: Wind armor passives
15–30% dodge chance per proc
DEF Up / ATK Up / SPD Up
Stat multiplier buffs · 1–3t
Applied by: various skills and gear procs
Stack ATK Up with high-multi ultimates
Stat multiplier buffs · 1–3t
Applied by: various skills and gear procs
Stack ATK Up with high-multi ultimates
⚔ What Classes Apply What
🏋 Tank
Applies: Stun (Shield Slam), Taunt + Barrier (self)
Gear: DEF Down via dark weapons, Thorn via earth armor
Gear: DEF Down via dark weapons, Thorn via earth armor
🛡 Knight
Applies: Stun (Warmaul/Soulfire proc), ATK Up (War Cry)
Gear: Stun-scaling via lightning mats, crit via lightning
Gear: Stun-scaling via lightning mats, crit via lightning
🔮 Mage
Applies: Burn, Freeze, Chill, Blind
Gear: Burn extend/magnify via fire mats, DoT via dark
Gear: Burn extend/magnify via fire mats, DoT via dark
💛 Cleric
Applies: Barrier (Aegis Ward, Sanctum), Regen
Gear: Barrier potency via light mats, heal boost via water
Gear: Barrier potency via light mats, heal boost via water
🎵 Bard
Applies: MATK Down, SPD Down, Barrier (Refrain, Bulwark Song)
Gear: SPD Up via wind, barrier via light mats
Gear: SPD Up via wind, barrier via light mats
✝ Paladin
Applies: Holy Burn, Blind, Shield (Sacred Shield)
Gear: Crit+Stun via lightning, burn via fire, mixed damage
Gear: Crit+Stun via lightning, burn via fire, mixed damage
ℹ About GachaMAL
GachaMAL is a fan-made gacha web game — a personal passion project.
All anime character data, names, and images are property of their respective copyright holders. This project uses the free and public Jikan API, an unofficial MyAnimeList API. GachaMAL is not affiliated with MyAnimeList, any anime studios, or IP owners in any way.
Non-Commercial Fan-Made No Real Money
🛠 How It Works
GachaMAL is a single-file HTML/CSS/JS web app hosted on Vercel. No frameworks, no build tools.
Character data — fetched live from api.jikan.moe (Jikan v4)
Stats — deterministically seeded from MAL ID, so every character always has the same base stats
Elements — assigned via seeded hash of MAL ID
Pity — SSR+ guaranteed at 70 pulls; UR guaranteed at 120
Gear — randomized blueprints with set bonuses and rarity tiers
Battle — turn-based speed bar system
Cloud saves — powered by Supabase (PostgreSQL + RLS). Sign in to sync across devices.
Auth — Supabase Auth (email or anonymous). Guest saves stay in localStorage.
Friends / PvP / Social — real-time via Supabase Realtime channels
👤 Credits
Character API: Jikan (jikan.moe) — unofficial MAL API
Character images/data: © MyAnimeList and respective copyright holders
Backend: Supabase
Hosting: Vercel
Fonts: Cinzel Decorative, Rajdhani, Orbitron, Share Tech Mono via Google Fonts
Inspiration: Various gacha games, wikigacha
Made for anime fans. No copyright infringement intended.
Contact: [email protected] — support, bugs, or business stuff.
🎓 Tutorial
New to GachaMAL? Run the tutorial again for a quick guided walkthrough of every tab and system.
Permanently erase all characters, gear, gold, and progress. Cannot be undone.
⚔
0
UNRANKED
🎟 0 Tickets
🔄 0 Refresh
🏅 0 Tokens
🛡 DEFENCE TEAM
▼